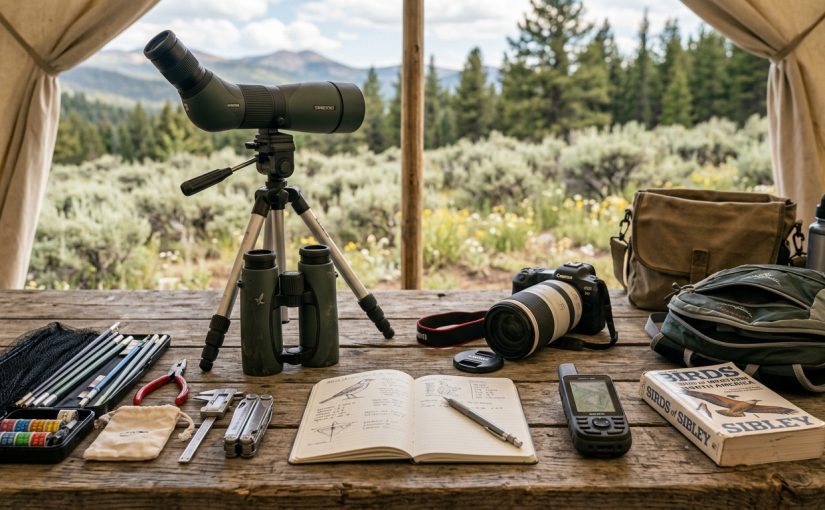
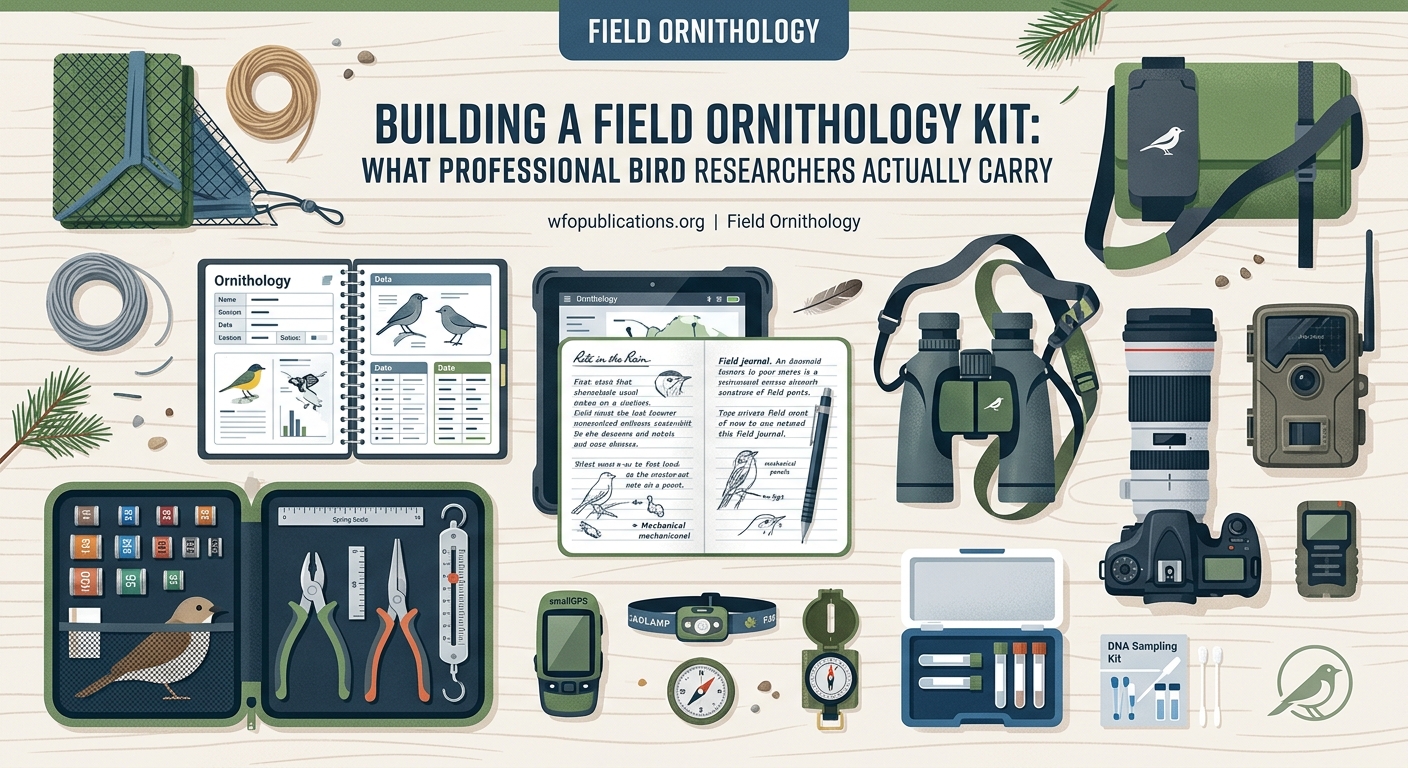
Professional bird researchers don’t just show up with binoculars and hope for the best. Every piece of gear in their pack serves a specific purpose, whether capturing precise GPS coordinates, recording vocalizations at dawn, or safely banding a warbler. If you’re ready to move beyond casual observation and start collecting data that matters, understanding what equipment professionals actually use will save you time, money, and frustration in the field.
Professional bird research field equipment includes specialized optics, GPS devices, audio recording systems, banding supplies, and data collection tools. Graduate students and early-career ornithologists should prioritize durable binoculars, weatherproof notebooks, and reliable recording devices before investing in expensive specialized gear. Most researchers build their kits gradually, starting with core observation tools and adding equipment as specific research questions demand.
Optics That Actually Hold Up in the Field
Your binoculars will take more abuse than any other piece of equipment. Rain, humidity, accidental drops, and constant jostling in your pack are inevitable.
Most professional ornithologists use 8×42 or 10×42 binoculars. The first number indicates magnification, the second measures the objective lens diameter in millimeters. An 8×42 configuration offers a wider field of view, making it easier to track fast-moving birds in dense vegetation. The 10×42 setup provides more magnification for open habitats like grasslands or coastal areas.
Waterproof and fog-proof construction isn’t optional. Temperature changes between early morning surveys and midday heat will fog up non-sealed optics. Nitrogen or argon purging prevents internal condensation.
Spotting scopes become necessary for shorebird surveys, raptor counts, or any work requiring species identification beyond 100 meters. A 20-60x zoom scope with an 80mm objective lens handles most field situations. Pair it with a sturdy tripod that won’t vibrate in wind. Carbon fiber tripods cost more but save significant weight on long hikes.
Recording Equipment for Behavioral Studies
Audio recorders capture vocalizations for species verification, individual identification, and behavioral analysis. Many graduate students start with handheld recorders like the Zoom H5 or Tascam DR-40X, which offer professional-quality recordings at reasonable prices.
Parabolic microphones amplify distant calls and reduce background noise. A clear recording from 50 meters beats a noisy one from 20 meters. Shotgun microphones work well for closer recordings and take up less pack space.
“I’ve reviewed thousands of recordings from student projects. The biggest mistake is inadequate wind protection. A $300 recorder with a $15 windscreen produces worse results than a $150 recorder with proper wind protection.” — Dr. Sarah Chen, Behavioral Ecology Lab, Cornell University
Bring extra batteries and memory cards. Cold temperatures drain batteries faster. A recording session that should last four hours might die in two if temperatures drop below freezing.
Navigation and Location Documentation
GPS units provide the coordinate precision required for scientific publications. Smartphone apps work for casual use, but dedicated GPS devices maintain accuracy under dense canopy and don’t die when you need them most.
Garmin eTrex and GPSMAP series units are field standards. They log waypoints, track routes, and function in conditions that would destroy a phone. Mark nest locations, survey transects, and observation points with coordinate accuracy within 3 meters.
Paper maps and a compass remain essential backups. Batteries fail. Electronics break. Knowing how to navigate with a topographic map and compass has saved more than one research season.
Smartphone apps like Avenza Maps allow you to load georeferenced PDFs and track your location on custom maps without cell service. This bridges the gap between traditional paper maps and modern GPS technology.
Data Collection Tools That Survive Weather
Waterproof field notebooks outlast regular paper by years. Rite in the Rain notebooks handle rain, humidity, and the occasional stream crossing. Use pencils or specialized pens that won’t smear when wet.
Many researchers now use tablets with ruggedized cases. The iPad with a Lifeproof case or purpose-built field tablets like the Panasonic Toughpad allow digital data entry directly into spreadsheets or specialized apps. This eliminates transcription errors from paper to computer later.
Voice recorders serve double duty. Beyond capturing bird vocalizations, they let you record field notes hands-free while observing behavior or during surveys when stopping to write would disrupt timing.
Clinometers measure tree height for nest site characterization. Rangefinders provide accurate distance measurements for territory mapping. These specialized tools address specific research questions but aren’t necessary for every project.
Banding and Capture Equipment
Bird banding requires federal permits and extensive training. Never attempt to band birds without proper authorization and supervision.
Mist nets come in various mesh sizes and heights. A 12-meter net with 36mm mesh handles most passerines. Larger mesh sizes target bigger species. Black nets are less visible to birds than white ones.
Banding pliers, numbered aluminum bands in multiple sizes, and a calibrated scale are minimum requirements. Most banding operations also include:
- Calipers for measuring wing chord, tarsus length, and bill dimensions
- Ruler for tail and wing measurements
- Magnifying loupe for examining molt patterns and feather wear
- Fabric bird bags in multiple sizes for temporary holding
- First aid supplies for the rare occasions when birds injure themselves in nets
A banding kit grows over time. Start with basics and add specialized tools as your research demands.
Photography Gear for Documentation
Camera equipment varies wildly based on research needs. Some projects require only basic documentation photos. Others demand high-resolution images for plumage analysis or individual identification.
A camera body with fast autofocus and good high-ISO performance handles low-light conditions during dawn surveys. Pair it with a telephoto zoom lens in the 100-400mm range for versatility. Prime lenses offer better image quality but less flexibility in the field.
Trail cameras document nest activity, feeding behavior, and nocturnal visitors without researcher presence affecting behavior. Browning, Bushnell, and Reconyx make reliable models. Look for fast trigger speeds and good battery life.
Action cameras like GoPros mount inside nest boxes or near feeding stations for unique perspectives. Their wide-angle lenses aren’t ideal for species identification but excel at capturing behavior.
Weather Protection and Field Clothing
Your equipment needs protection, but so do you. Hypothermia doesn’t care about your research timeline.
Layered clothing adapts to changing conditions. A moisture-wicking base layer, insulating mid-layer, and waterproof outer shell handle most situations. Avoid cotton, which loses all insulating value when wet.
A quality rain jacket and pants keep you functional during unexpected storms. Surveys don’t stop for light rain, and many species are most active during or after precipitation.
Boots matter more than most graduate students realize. Waterproof hiking boots with ankle support prevent twisted ankles on uneven terrain. Break them in before fieldwork starts. Blisters end surveys early.
Power Management in Remote Locations
Extended field sessions demand power solutions beyond standard batteries. Solar chargers work well for multi-day trips with clear weather. A 20-watt panel charges most devices in 4-6 hours of direct sunlight.
Portable battery banks provide backup power for phones, GPS units, and small electronics. A 20,000mAh battery bank recharges a smartphone 4-5 times. Look for models with multiple USB ports to charge several devices simultaneously.
Rechargeable AA and AAA batteries reduce waste and long-term costs. A good charger and 12-16 batteries handle most equipment needs. Keep batteries organized by charge state to avoid confusion in the field.
Safety and Emergency Equipment
Field research involves inherent risks. Proper preparation prevents most emergencies.
A comprehensive first aid kit addresses common injuries: cuts, blisters, insect stings, and sprains. Include any personal medications, antihistamines, and pain relievers. Wilderness first aid training teaches you how to use these supplies effectively.
Emergency communication devices save lives in remote areas. Personal locator beacons (PLBs) send distress signals via satellite when activated. Satellite messengers like Garmin inReach allow two-way text communication and check-ins when outside cell coverage.
Bear spray, snake gaiters, or tick prevention measures depend on your field site. Research local hazards before your first survey.
Organizing Your Field Kit
| Equipment Category | Essential Items | Optional Additions |
|---|---|---|
| Optics | 8×42 binoculars, lens cloth | Spotting scope, tripod |
| Audio | Handheld recorder, windscreen | Parabolic microphone, backup recorder |
| Navigation | GPS unit, compass, maps | Smartphone with offline maps |
| Data Collection | Waterproof notebook, pencils | Tablet, voice recorder |
| Documentation | Basic camera, memory cards | Telephoto lens, trail cameras |
| Safety | First aid kit, emergency beacon | Satellite messenger, bear spray |
Pack organization prevents fumbling for equipment during critical observations. Use a backpack with multiple compartments to separate delicate optics from other gear. Silica gel packets in electronics compartments absorb moisture.
Create a checklist for each field day. Even experienced researchers forget items without systematic preparation. Review and update your list after each trip based on what you actually used and what you wished you had brought.
Building Your Kit Over Time
Don’t buy everything at once. Start with quality binoculars, a waterproof notebook, and a basic GPS unit or smartphone with offline maps. These three items support most observational research.
Add equipment as specific research questions demand. Studying vocal behavior? Invest in recording gear. Working with marked individuals? Photography equipment becomes priority. Conducting nest surveys? A spotting scope saves eye strain.
Buy used equipment when possible. Graduate student budgets rarely accommodate new professional-grade gear. University equipment pools, retiring professors, and online marketplaces offer functional equipment at reduced prices.
Consider these priorities for building a complete kit:
- Start with core observation tools: binoculars, field notebook, basic navigation
- Add data collection equipment specific to your research questions
- Invest in weather protection and safety gear before your first extended field session
- Acquire specialized tools like banding equipment only after training and permits
- Upgrade optics and electronics as budget allows, keeping old gear as backups
Testing Equipment Before Field Season
Never trust new equipment on day one of data collection. Test everything during practice sessions near campus or home.
Learn your GPS unit’s interface before you need to mark a nest location while mosquitoes swarm your face. Practice setting up mist nets in your backyard before attempting it in the dark at 4:30 AM. Record audio in various conditions to understand your equipment’s limitations.
Calibrate scales and calipers regularly. Check GPS accuracy against known benchmarks. Verify that your camera’s autofocus works in low light. These tests reveal problems when you can still fix them.
Break in new boots on short hikes before committing to an 8-kilometer survey transect. Adjust backpack straps and weight distribution during practice sessions. Physical comfort directly impacts data quality when you’re conducting your fifth hour of observations.
Maintaining Equipment Between Seasons
Proper maintenance extends equipment life and prevents field failures. Clean binoculars and camera lenses with appropriate materials. Store electronics with batteries removed to prevent corrosion. Wash mist nets and repair small tears before they become large holes.
Create a maintenance schedule. Some tasks happen after each field day: wiping down binoculars, downloading data, recharging batteries. Others occur monthly or seasonally: deep cleaning optics, updating GPS firmware, replacing worn bootlaces.
Keep detailed records of equipment purchases, maintenance, and repairs. This documentation helps with grant applications, equipment loans, and insurance claims if gear is lost or damaged.
Making Your Kit Work for You
The best field kit is the one you’ll actually carry and use consistently. A lighter pack encourages longer surveys and reduces fatigue. Expensive equipment gathering dust at home helps nobody.
Match your gear to your research questions, field sites, and physical capabilities. A 70-year-old professor studying grassland birds needs different equipment than a 25-year-old graduate student climbing to canopy nests.
Your kit will change as your research evolves. The equipment that served you well during coursework might not suit your dissertation project. Stay flexible and willing to adapt.
Professional ornithologists build their field kits through years of trial, error, and gradual refinement. Start with essentials, learn what works for your specific needs, and invest in quality gear that will support accurate data collection season after season. Your research deserves equipment that won’t fail when observations matter most.